Yummy New Posts

Sweetcorn Salsa, a Great Side Dish or Enjoy as a Salad with Cashew Dip

Sweetcorn Salsa, a Great Side Dish or Enjoy as a Salad with Cashew Dip

I love the taste of sweetcorn and can have it in so many different ways. When added to any dish, they add a mild sweetness as well as creaminess to it. Its one of my favorite ingredients to work with while experimenting with raw recipes. 

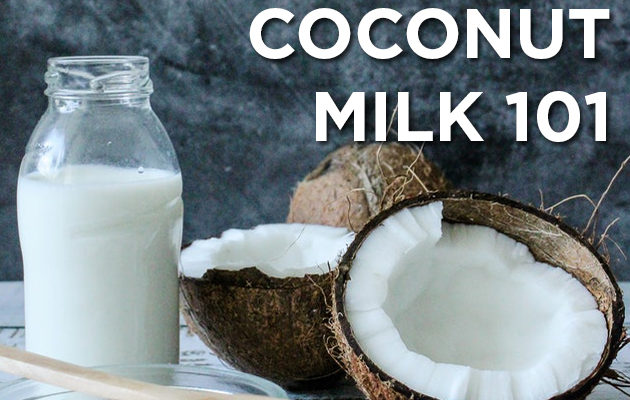
Coconut Milk 101: Recipes and Beyond, Read, Watch & Learn

Coconut Milk 101: Recipes and Beyond, Read, Watch & Learn

Hello all. Since I started writing recipes for this blog, I realized how much I enjoy using coconut milk. It is so versatile and can be used in so many different ways. I use it to make vegan milk shakes, smoothies, raw or cooked desserts, 

Vegan Chocolate Smoothie Recipes: All you need to know

Vegan Chocolate Smoothie Recipes: All you need to know

There are so many ways to make vegan chocolate smoothies and I am going to share a few in this blog.

If you are trying to stay off caffeine, then feel free to replace cocoa powder or cacao powder with carob powder. The taste is quite different and can take time to getting use to it, using some vanilla extract or vanilla bean powder with this makes it easy as it adds a nice flavor.

Read till the end for various options to garnish these smoothies.

Continue reading Vegan Chocolate Smoothie Recipes: All you need to know

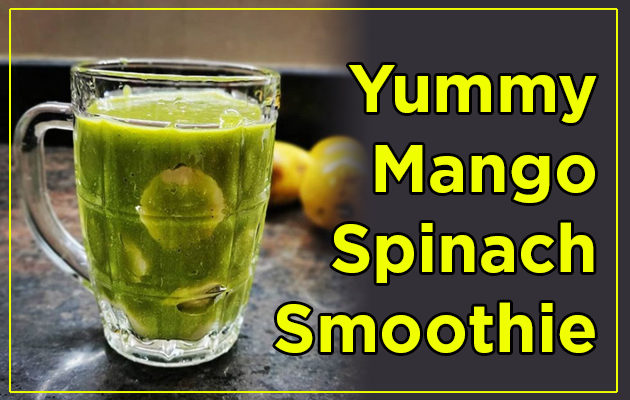
Yummy Mango Spinach Smoothie Recipe, Dairy Free, Sugar Free

Yummy Mango Spinach Smoothie Recipe, Dairy Free, Sugar Free

Before I start with the smoothie recipe, I would like  to share that the most ideal way to eat fruits is by not mixing with other food groups like vegetables or nuts. However, it is OK to occasionally mix them with some green leafy vegetable 

Sunshine Mango Smoothie Bowl, Kid Friendly, Dairy Free, No Preservatives

Sunshine Mango Smoothie Bowl, Kid Friendly, Dairy Free, No Preservatives

Plant-based smoothies are one of the healthiest breakfast options we have. Apart from being highly delicious and nutritious, they are a great source of fiber as well. Turn your smoothie into a smoothie bowl and becomes a complete meal that can keep you full for 

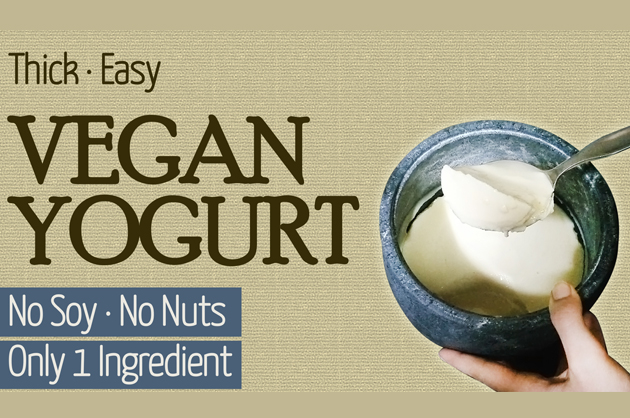
Chickpea Yogurt, Soy-free, Nut-free, Gluten-free, Vegan Yogurt

Chickpea Yogurt, Soy-free, Nut-free, Gluten-free, Vegan Yogurt

If you have decided to give veganism a try, we know it can be difficult to find alternatives to your favourite dairy products! But, don’t worry, we are here to help. Here is a very easy vegan yogurt recipe, that you can prepare with just one ingredient! This yogurt is high in protein that can be easily digested by the body. It is soy-free, nut-free and sets just like dairy yogurt! What are you waiting for? Scroll down to discover this ultimate recipe!

Print Recipe

What you need:

  • 1 Cup Chickpeas (dry, not canned)
  • Water (1 litre for soaking, 3-4 cups for making chickpea milk)
  • Curd Starter. Option 1: 2 tbsp of soaking water from chickpea. Option 2: green chili crowns (head of green chilly).

This will make around 1L of vegan yogurt, if you want to make less, kindly adjust the quantity accordingly.

To watch a video of this recipe:

Procedure:

  • Take 1 cup of chickpeas and soak it in one litre of water for about 12 hours. Alternatively, you can soak them in hot water for 8 hours.
    Soaking time will vary on weather conditions. A good way to get this right is by looking for air bubbles in the soaking water. Once you see these, you are ready to go ahead to next step.
  • This water with the bubbles can be used as the curd starter. Take about 2 tablespoons of this water and store it to be used later. Strain the rest of the water into another container. This can be used to water your plants, but do not consume it yourself.
  • Take 3-4 cups of fresh drinking water. Add the soaked chickpeas to the blender along with 1 cup of water and blend. Then, add a little more water to it and blend again to form a smooth paste. Add the remaining water to it and mix with a spoon. We avoid adding all 4 cups water at the same time to make sure we get a smooth paste first. If you have a high-speed blender then you can add all the water at once.
  • Take a cotton cloth or a nut milk bag and place a container below it. Add half the quantity of the chickpeas paste to the cloth/bag and squeeze it to extract the milk. Repeat this with the other half of the chickpeas paste. The pulp that is left behind can be added to chapathi flour, soups, dals, or other recipes. You can also mix it with boiled potato/sweet potato and other vegetables and herbs to make cutlets.
  • Stir the milk, then, move it to a pan and place it on the stove. Stir it again to make sure it doesn’t settle at the bottom, before switching on the stove. If you don’t do this step, it will stick to the bottom and turn into a solid gel. Keep stirring the milk until it begins to boil and the consistency is thick like custard.
  • You may notice foam building up during this process. You can remove it as and when required, but its not necessary as we will be fermenting this.
  • Once the milk has boiled and you have the right consistency, switch off the stove and let it cool down. You can keep stirring to make sure it cools down evenly. Else it will cool from the top and still be hot underneath.
  • Wait till the milk comes to a lukewarm temperature. You can check the temperature by adding a few drops of it on your finger. It shouldn’t burn your finger, but should feel comfortably warm.
  • Transfer the milk to a non-metallic container. Glassware, stoneware and earthenware are good options. Avoid fermenting anything in metal or plastic as they leach into your food or the bacteria reacts with them.
  • At this point, Add 2 tablespoons of the soaking water that you saved at the start of this recipe. This will act as a starter. If you start preparing this recipe on a regular basis, you can use 1 teaspoon of whey (water from the previous day’s yogurt) as the starter. This will make the fermentation process faster.
  • Stir the starter thoroughly. You can also use your clean finger to stir to give additional bacteria from your skin. Cover the container with a loose lid and let it sit.
  • The process can take anywhere between 6 to 12 hours depending on the weather. If the weather is very cold, you can cover the container with a blanket to keep it warm.
  • Your dairy, soy and nut-free yogurt is ready!

When it is ready it will look just like dairy yogurt/curd and will have a thick consistency.

TASTE ALERT!!!!

It has a beany taste, and I do not like it as it is. It works really well in savoury dishes like raita, kadhi and chaas! You can also use this for baking.

To use this vegan yogurt for sweet dishes, you can try these tips below that were suggested by my YouTube subscribers.

TIP 01: “While soaking the chickpeas, add a few dates in this water. Once soaking is done, remove the dates and few spoons of this soaking water to make date paste. Now use 2 tbsp of this date paste as a starter. Also add some lemon zest when you add the starter.”

TIP 02: Add some vanilla powder when you add the starter, this helps mask the beany taste a bit, and before consuming must add some lemon juice with your choice of sweetener to further reduce the beany taste. It will taste great.” by Emine Demir.

Enjoy your dairy-free, protein rich vegan yogurt/curd!

Chickpea Yogurt

Prep Time 10 mins
Cook Time 40 mins
Soak + Ferment 16 hrs
Total Time 16 hrs 50 mins
Course Main Course, Side Dish
Servings 3 Cups

Equipment

  • Blender
  • Cheese cloth/nut milk bag/muslin cloth
  • Heavy bottom pan
  • Curd pot/Non metallic pot like glass, clay, stone, ceramic

Ingredients
  

  • 1 cup dry chickpeas need to use dry chickpeas, not canned. Should be raw, not cooked.
  • 4 cup water for soaking
  • 3-4 cup water for making milk
  • Curd Starter. Option 1: 2 tbsp of soaking water from chickpea. Option 2: green chili crowns (head of green chilly)

Instructions
 

  • Soak the chickpeas in 4 cups water for 8-12 hours. This depends on your weather. If its hot and humid, 8 hours will be enough.
  • CURD STARTER: After 8 hours, water should have bubbles. Save 2 tbsp of this water to be used as the curd starter. In case you forget to save this water, 5-6 green chilli heads can also be used.
  • Strain the remaining water, you can use this to water your plants.
  • Now blend the chickpeas in the blender with 1 cup of fresh water to form a smooth paste. Don't blend it too much, else it will be difficult to extract the milk. It should be a little coarse.
  • Now add the remaining 3 cups water (or 2 to reduce cooking time) and blend just for few more seconds.
  • Take a cotton cloth or a nut milk bag and place a container below it.Add half the quantity of the chickpeas paste to the cloth/bag and squeeze it to extract the milk.
  • Repeat this with the other half of the chickpeas paste.
  • Stir the milk, then, move it to a pan and place it on the stove. Stir it again to make sure it doesn’t settle at the bottom, before switching on the stove.
  • Turn the stove on and heat the milk on medium heat. Keep stirring the milk until it begins to boil and the consistency is thick like custard.
  • You may notice foam building up during this process. You can remove it as and when required.
  • Once you have the right consistency, switch off the stove and let it cool down.
  • Keep stirring to make sure it cools down evenly. Else it will cool from the top and still be hot underneath.
  • Wait till the milk comes to a lukewarm temperature. You can check the temperature by adding a few drops of it on your finger. Ideal temperature to add the starter culture for fermentation is around 38°C to 44°C (100°F to 110°F)
  • Transfer the milk to a non-metallic container.
  • Add 2 tablespoons of the soaking water that you saved at the start of this recipe. This will act as a starter.
  • Stir the starter thoroughly. You can also use your clean finger to stir to give additional bacteria from your skin. Cover the container with a loose lid and let it sit.
  • The process can take anywhere between 6 to 12 hours depending on the weather. If the weather is very cold, you can cover the container with a blanket to keep it warm.
  • Check back in 6-8 hours. It is done once it has a sour taste.

Video

Notes

  1. While making the milk, you can use minimum 3 cups water (instead of 4) to reduce the cooking time but this will leave a stronger bean-y after taste in the yogurt.
  2. The pulp that is left behind can be added to chapathi flour, soups, dals, or other recipes. You can also mix it with boiled potato/sweet potato and other vegetables and herbs to make cutlets.
  3. The yogurt has a strong chickpea taste, works very well in baking and savory recipes like kadhi, other indian curry or raita
Keyword yogurt

Product recommendations by Priyanka in US
Product recommendations by Priyanka in INDIA
Our Brand of Reusable Menstrual Products
Use code HNY15 for 15% discount on SochGreen website.

Disclaimer: This blog contains affiliate links, which means that if you click on one of the product links, we will receive a small commission. This helps support the blog and allows us to continue to put up information like this. Thank you for the support!

Note: This is Priyanka Jain’s Recipe, Video transcribed by Rohini Ravee Ramanathan.

Easy Homemade Probiotic Recipe to Improve Gut Health

Easy Homemade Probiotic Recipe to Improve Gut Health

In this article, we will share with you a simple and easy probiotic recipe that you can prepare at home. Before we go into the recipe, let us try to understand probiotics and their importance.   We have trillions of microbes in our gut. The 

Almond Yogurt Recipe That Tastes Just Like Dairy Curd – With Sesame, Rice And Almonds

Almond Yogurt Recipe That Tastes Just Like Dairy Curd – With Sesame, Rice And Almonds

If you are looking for a thick, creamy vegan yogurt made without any artificial thickeners, then look no further. There are many different recipes for making vegan yogurt. I recently posted a chickpea yogurt recipe, and some of you mentioned that you did not like the 

Oil-free Vegetable Biryani Recipe – Healthy, Vegan, Gluten-free

Oil-free Vegetable Biryani Recipe – Healthy, Vegan, Gluten-free

All you biryani lovers out there, here is a way to enjoy your biryani guilt free. In this article, I am going to share with you a special recipe for an oil-free, healthy, vegan biryani that tastes delicious!
The recipe is pretty simple and straightforward.

Jump to Recipe


Here’s the list of ingredients you’ll need to prepare this.

  • 1 cup rice – I like to use semi-polished rice for biryani. You may also choose to use millets or brown rice.
  • Vegetables – 250 g cauliflower, 150 g beans, 250 g jackfruit, 100 g carrots, 100 g capsicum, 250 g peas, 3 large onions, 3-4 tomatoes
  • 1 inch ginger piece
  • 4-5 garlic cloves
  • 2 bay leaves
  • 2 black cardamom
  • 1 cinnamon stick
  • 4-5 cloves
  • 1 green chilli
  • Powdered spices – 1 tbsp coriander powder, 1 tsp turmeric powder, 1 tsp cumin seeds, 2 tsp red chilli powder, salt to taste

vegetable biryani, oil free biryani, vegan biryani

Vegetable Prep For the Oil Free Biryani

Firstly, we need to chop all the vegetables. I like to cut them up into big pieces that are about 1 inch in size. You can cut them up into your preferred size. Then, we need to steam these vegetables.

Since jackfruit will take the longest to cook, add them first. Once they are a little tender, add the carrots, beans and cauliflower. Leave them for a few minutes and then add onions and capsicum. Meanwhile, take the peas and boil them separately. Once the vegetables are cooked, move them into a bowl.

Gravy Prep For Vegetable Biryani

Next, we will prepare the gravy. For this, take 2 onions and chop them finely. Take tomatoes, green chillies, ginger and garlic and chop them roughly. Put all of them (except onions) into a blender and blend them to form a smooth paste. This is the tomato puree that we will be using later.
Take the bay leaves, cloves, black cardamom, and cinnamon stick in a heavy bottom steel pan and dry roast them.

It is very helpful to have a good quality heavy bottom steel pan for oil-free cooking. Please avoid using aluminium vessels for this purpose as they leach aluminium into the food. In a few minutes, you will be able to smell the aroma of the spices. At this point, add the chopped onions along with some salt. The salt will help some water to come out from the onions, which will make it easier to cook. Let it cook on a low flame. You can add some hot water if the onions start sticking to the pan.

Meanwhile, we can prepare the oil free tadka (tempering).

Take a small pan (tadka pan) and add cumin seeds. Let it cook till it begins to splutter. Once cooked, turn off the stove and then add the powdered spices. Do not do this while the stove is on because the spices will burn instantly.

Mix the spices and keep them aside.
Now, check on the onions and cook until they turn translucent and light golden brown in colour. Keep adding hot water as and when required. Adding cold water will reduce the temperature of the pan and that will increase the cooking time, hence it is recommended to use hot water.
Once the onions are cooked, add the tomato puree that we prepared earlier and let it cook. After a few minutes, I like to remove the spices because I don’t like to bite into them while eating the biryani. Next, add the tadka (tempering) as well. Mix well, add some water and let it cook for a while. You can add more water to it if so required.

Then, add all the vegetables to this along with some salt and mix again. Let this cook for few more minutes until all the water gets absorbed.
The vegetable gravy is now ready and can be mixed with boiled rice/millet.
To prepare the boiled rice, you can soak the rice for about 8 hours before boiling it. Once boiled, you can remove the starch water from it and ferment this water for making the probiotic drink.
After mixing the rice with the vegetable gravy, your oil-free biryani will be ready! Transfer it to a serving dish. To make this even better, you can prepare vegan raita to have along with the biryani. Check out this recipe to learn how you can make vegan yogurt with rice and almonds that can be used to make the raita.


Enjoy your guilt-free biryani! Let us know how you enjoyed this recipe in the comments.

Vegan Biryani

Course Main Course
Cuisine Indian

Equipment

  • Blender
  • Deep cooking pan or Kadhai

Ingredients
  

  • 1 cup Rice I like to use semi-polished rice for biryani. You may also choose to use millets or brown rice.

Vegetables

  • 250 gm cauliflower
  • 150 gm French beans
  • 250 gm Jackfruit
  • 100 gm Carrots
  • 100 gm Green Capsicum,
  • 250 gm Peas
  • 1 Onions large

For the Gravy

  • 2 Onions large
  • 3-4 Tomatoes
  • 1 inch Ginger piece
  • 4-5 Garlic cloves medium
  • 3-4 Bay leaves
  • 2-3 Black cardamom (moti elaichi)
  • 1 Cinnamon stick (dalchini) approx 2"
  • 4-5  Cloves (laung)
  • 1 Green chilli

Powdered Spices

  • 1 tbsp Coriander powder (dhaniya powder)
  • 1 tsp Turmeric powder (haldi)
  • 1 tsp Cumin seeds
  • 2 tsp Red chilli powder (lal mirch powder)
  • Salt to taste

Instructions
 

Vegetables

  • Chop all the vegetables about 1 inch in size and steam them
  • Keep in mind that jackfruit will take longer to cook as compared to others, add them first in the steamer
  • Next add carrots, beans and cauliflower
  • Few minutes later add onions and capsicum
  • In a small pan, boil the peas till soft
  • Once cooked, keep all vegetable in a bowl

Tadka (tempering)

  • Take a small pan (tadka pan) and add cumin seeds, cook till they splutter
  • Now turn off the stove and add the powdered spices
  • Mix and keep this aside

Gravy

  • Roughly chop tomatoes, green chillies, ginger, garlic and add to the blender, blend to form a smooth paste
  • In a heavy bottom pan, take the bay leaves, cloves, black cardamom, and cinnamon stick and dry roast them
  • Once you can smell the aroma of the spices, add the chopped onions along with some salt and let it cook on a low flame
  • Keep some hot water handy and keep adding 1-2 tbsp as and when required if the onions start sticking to the pan
  • Once the onions are cooked, add the tomato puree and let it cook
  • Next, add the tadka (tempering) to this and mix well, add some water and let it cook for a while. You can add more water to it if required
  • Add all the vegetables to this along with some salt and mix again. Let this cook for few more minutes until all the water gets absorbed.
  • The vegetable gravy is ready, mix boiled rice or millet to this and Enjoy!

Video

Keyword biryani, vegan

Note: This is Priyanka Jain’s Recipe, Video transcribed by Rohini Ravee Ramanathan.

Product recommendations by Priyanka in US
Product recommendations by Priyanka in INDIA
Our Brand of Reusable Menstrual Products
Use code HNY15 for 15% discount on SochGreen website.

Disclaimer: This blog contains affiliate links, which means that if you click on one of the product links, we will receive a small commission. This helps support the blog and allows us to continue to put up information like this. Thank you for the support!