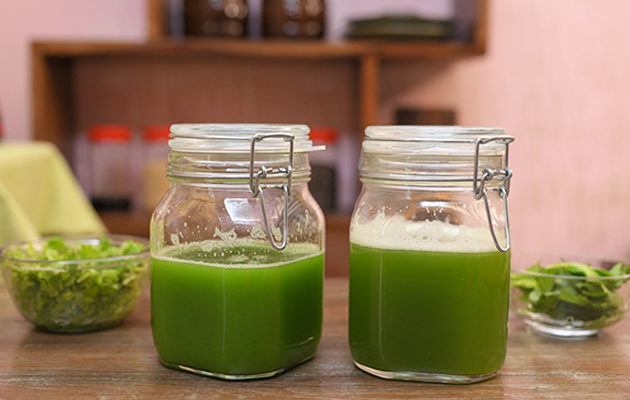
A green juice a day keeps the doctors away! What is a Green Juice? It is a juice made with any green vegetables (and leafy greens) of your choice but I will suggest looking for organic, local and seasonal vegetables. Apart from green vegetables, you …
In the last few years, I’ve tried a number of plant-based milks, and I use them all depending on my mood or what’s available in the house or what am I making with it. I figured out that, I really like chocolate milk or the …
After turning vegan, I wanted to make sure I do not get caught up in the “unhealthy vegan” diet that is loaded with junk food or preservatives and I naturally shifted to more and more raw foods. I noticed I was eating a lot more salads and fruits and I also made an effort to eat only what was available locally and in season. This limited the choices I had and soon I began to get bored of eating salads and fruits. I started to make an extra effort to make this more fun for myself and I came across various healthy salad dressings and raw vegan soups. I instantly fell in love with them, they were delicious and made my usual salad look like a complete meal.
I preach what I practice. After noticing endless benefits of being on a mostly raw vegan diet, I encouraged all my clients to do the same but a lot of them were finding it difficult to include salads in their diet because of all or any one of these reasons:
Eating a large bowl of salads takes very long
Adding raw foods causes bloating/digestive issues
Certain health issues make it difficult for the body to accept raw foods
Whatever be the reason, replacing salads with raw soups helped everyone to slowly make their system accept raw foods eventually include more salads in their diet.
What is a Raw [Cold] Soup?
A RAW SOUP is simply a soup that is made without cooking any ingredients and technically speaking, that means we do not cook anything over 44°C or 110°F. When food is cooked over these temperatures, the heat begins to denature the food. This is also the temperature that our bodies can handle comfortably.
Test it yourself!
You can do a simple test by taking some water at 44°C and dip your finger in it. It will feel lukewarm and not burn your finger. The same happens to all enzymes and nutrients in our food. Just the way we won’t be able to survive in temperatures higher than this, the enzymes in fruits and vegetables will also die at higher temperatures. Thus raw soups have HOPE.
H: Hormones. Our bodies constantly need plant hormones for our hormonal health. When we consume hormones from animal products (including dairy), it sets hormonal imbalance in the body. When we heat any food over 44°C, plant hormones are not able to survive. Raw soups are full of hormones that our body needs.
O: Oxygen. There is oxygen in all fruits and vegetables but again we destroy it while cooking. Every single cell in our body needs oxygen to carry out its day-to-day function and raw foods supply us this oxygen in its purest form.
P: Phytonutrients. These are chemical compounds produced by plants, and may help us with improved immunity to resist fungi, bacteria and virus infections.
E: Enzymes. They act as a catalyst to bring about a specific biochemical reaction. Our body needs enzymes for various functions including digestion. If we do not consume enzymes through raw foods, then the body will end up exhausting its own limited resources of enzymes.
Apart from this, what I really like about raw soups is that they are very quick and easy to prepare, making them an ideal snack or even a meal replacer. You can use them as a salad dressing too.
If you are still not convinced, then here is a quick list of few more benefits:
Give you great energy
Help you sleep better
Can help with various health problems
There is less time spent in the kitchen
Less energy spent in cleaning up
Low in calories, high in nutrients
Easy to digest
Increased focus and mental clarity
Cruelty free, as we have not used any animal products including dairy
If you are thinking about how you will enjoy these cold soups in winters, then we have the right solutions for you.
Once your soup is ready, you can warm them up till 44°C and it will still be considered raw.
Another way to enjoy in cold weather is blending the soups a little longer (around 3-4 minutes, depending on your blender). When we do this, the blender jar begins to get hot, warming up the soup. Just make sure to stop the blender when it’s a bit warm, don’t let it get too hot else it will start “cooking” the soup.
Use warm water while making the soup.
Which method you should use will really depend on the recipe and I have mentioned these options as and when appropriate within each recipe.
Pro Tips for Making Delicious Raw Vegan Soups
I have been experimenting with raw soups for quite some time now, and below are a few of my kitchen secrets that can help in making raw soups more delicious.
Textures: to incorporate various textures within the soup, you can blend some ingredients and then add some later and just pulse a few times. Especially the greens. You will get a good idea once you see the recipe videos.
Fresh herbs/leafy greens: these make a great addition to raw soups but it’s a good idea to add them towards the end. If we add them in the blender in the beginning, they impart a very strong flavour and also make the soup look green and we don’t want all soups to look green. The best way to include these is 1. By chopping them fine and adding as a garnish or 2. Once the soup is blended, add the greens in the blender and run it on pulse setting just for a few seconds (3-5 times is ideal).
Vegetables: Make sure they are fresh and tender. Chop off any parts that are over ripe or even under ripe. Both over or under ripe vegetables can ruin the taste and even texture of the soup.
Lemongrass: lemongrass adds a great flavour if you want to make Thai soup. However, it is a bit tricky to use and can add threads in the soup. Make sure to buy fresh lemongrass and only use the bottom 2″ of the entire stalk. The rest is very fibrous and is a big NO for raw soups. This leafy part can be used to make lemon grass tea or vegetable stock that can be used in various cooked recipes.
Leaks: I really like using leaks in raw soups. Firstly, they do not have a strong raw taste like onions and secondly they make a great garnish. When using leaks, we should only use the bottom white part as this is not too fibrous. The green leafy portion is not digestible by our body and can be used to make cooked soups or vegetable broth for other recipes.
Marinate: since we are using everything raw, some vegetables leave a strong “Raw” taste in the soup, specially onions. The key for this issue is marination. We can either marinate the vegetables for 2 hours before making the soup or we can make the soup and let it sit in the fridge for 2 hours before consuming. Which option is better will depend on the recipe and I have mentioned this under each recipe.
Mushrooms. Yes, we can eat them raw. Just make sure they are fresh and that you marinate them long enough so that they become soft and tender. Button mushrooms, cremini and oyster mushrooms all work pretty well in raw soups. My favorite is oyster mushroom. Portobello can also be used, but it’s not for you if you do not already have a pallet for raw foods.
Cucumbers. They make a good ingredient for the base of your soup as they are mostly water. I prefer to remove the skin as the skin will add a green color to the soup. If you don’t mind that, then you can keep the skin on. Also, look for the seedless cucumbers or remove the seeds as they may not blend well in the soup.
Date puree. It is good to have this handy in your freezer. Just add a spoon whenever you feel like a sweetener is missing in the recipe.
Tamarind pulp: This can be added if you want to make the soup sour.
Turned out NOT tasty? When we are new to raw soups, while experimenting in the beginning it is possible they don’t taste as you would expect them. To save the soup and make it more palatable, add ½ cup of coconut milk or any plant milk of your choice. This works with most recipes. But if you are following the recipes in this document, this should not be a problem.
Red chilli powder: These come in a variety and each one has a different level of hotness. I don’t like my soup to be very spicy but I like the orange/red colour that chilli powder can add, and that is why i personally prefer using organic kashmiri lal mirch (whole or powder). It is not very hot and gives a very nice color to the soup.
Lemon juice/vinegar: Go easy on these. You can add just a little when the recipe requires as the flavor gets enhanced after marination. You can always try the soup just before you garnish and add more if required.
Cashew: Technically speaking, cashews are not always raw. The method used to extract them from their outer shell usually involves boiling or roasting. But a lot of people use it in raw recipes. They add a very nice texture and have a neutral taste as compared to other nuts. If you are on a strictly raw diet, then feel free to replace cashews with any other nuts or seeds of your choice in the recipes.
It’s not just about what the soup tastes like. Our brain can start judging the moment our eyes fall on the soup. Make sure it looks tempting and attractive. Think in terms of shapes and colors. Experiment away, be creative. Below are a few options that are very simple but can go a long way to make your soup look lively and attractive instead of boring.
Whole Pepper: Always use whole pepper. I like to use the pepper mill as adding freshly ground whole pepper makes a huge difference to the taste as compared to ready-made powdered pepper. This also makes a great garnish as compared to the powder which will be hardly visible. If you don’t have a mill, a mortar and pestle will work just fine. Pepper is also satvik in nature :). So go ahead and add as much as you like.
Chilli flakes. Even these make a great garnish. So based on the recipe, you can decide between pepper and chilli flakes. Chilli flakes add a dramatic effect with their beautiful shades of whites and reds.
Microgreens. These are not only high in nutrition but make a great garnish too. They also add a nice crunchy punch to the soups. They are very easy to grow at home or you can also buy from various stores online/offline.
Sprouts. If microgreens are not available, feel free to add a spoon of sprouts to your soups. Some may not enjoy the taste of raw lentil sprouts, alfalfa/radish/clover sprouts are worth exploring.
Edible Flowers. They may be a bit expensive, but make the most prettiest and nutritious garnish for soups. Once in a while, go ahead and treat yourself. If you have some in your garden, then feel lucky and enjoy them everyday.
Vegetables. These vegetables can be chopped in various shapes and sizes: zucchini, tomatoes, leaks, cucumber, bell peppers, marinated mushrooms and used to decorate your soup. Look at the base color of your soup and pick a vegetable that is contrasting and will stand out.
Fresh Herbs. You can never go wrong with a few leaves/sprigs of fresh herbs like coriander, basil, mint, parsley, oregano, rosemary etc. See what you can find and what flavours you like.
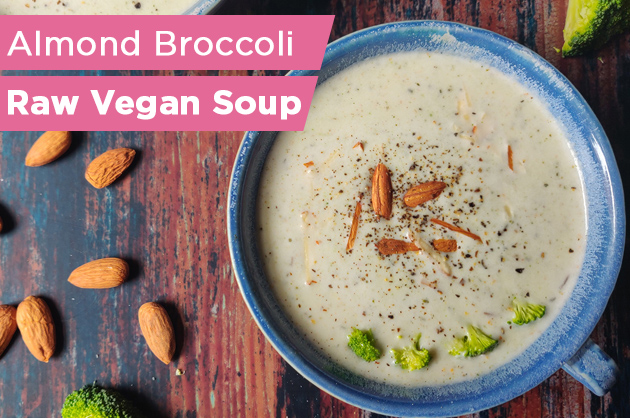
Almond Broccoli Raw Vegan Soup
Here is a recipe of one of my favorite raw vegan soups. In this recipe, I use broccoli 2 ways. The stem is peeled and blended to form the base and its florets are chopped finely and added towards the end to add a great crunch and texture to the soup.
Blender Juicer Milk Alternatives While Switching to a Plant-based Diet While switching to a plant-based diet, the first alternative we look for is dairy/cow’s milk. Majority of us are used to drinking milk on a daily basis either on its own, as a …
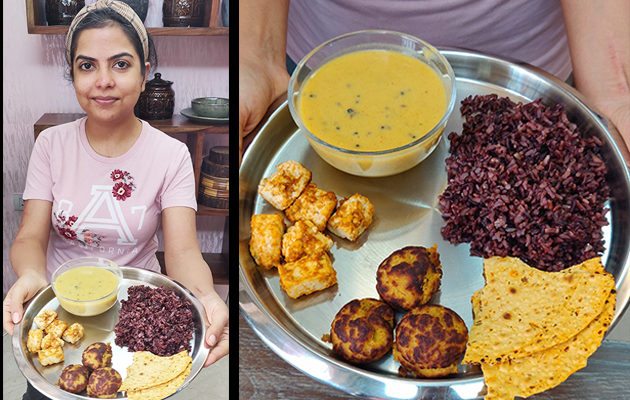
Here is my all time favorite dish: KADHI It can be made so many different ways and I guess different states follow different ways to make this… There is Gujarati kadhi, Rajasthani kadhi, Punjabi kadhi and maybe more that I don’t know of. Today, …
Making tofu at home is nothing new but for some reason I was hesitant to try. After turning vegan, I did spend a good amount of money on store bought tofu. I tried various brands and flavors and of course, different firmness too. But I could not find that was as good as what you get in a fine dine restaurant. Also, it is a lot of money as well.
Finally, the day came when I decided to give it a try. I saw various recipes on YouTube, and they are all quite similar and easy to do. Since then, I have done a few trials as below:
Making soy milk with the skin (of soy bean) on and then another one where I removed the skin.
Different ratio of soybeans:water while making the soy milk
Using lemon juice, diluted lemon juice and diluted vinegar as coagulant. Some people use “Nigari Salt” for this purpose but I have not tried it. It may give better results but I do not make tofu that often so did not feel the need to invest in this.
My observations
It did not make a difference in the quality of the tofu. Then why spend the extra time? Maybe if I made them both together and tried simultaneously, I would notice some difference in taste and color but overall I am quite happy with how they both turn out to be. I do not remove the skin anymore.
The ideal ratio of dry soybean:water for blending is 1:4
For best results, I use diluted lemon juice.
Home-made tofu is not only cheaper and free from preservative but it actually taste much better than a lot of store bought tofu options that I have tried.
Optional: Tofu Mould. I use DIY option as explained
For DIY option: A large bowl and colander
Ingredients
1.5cupraw, dry soybeanssoy can be GMO, look for organic/Non-GMO options
6cupwater for blending plus additional for washing/soaking
2-3tbsplemon juice or 2 tbsp vinegar
3/4cupwater for coagulant
Instructions
Wash and soak the soybeans in water for 6-10 hours* (read notes).
The Coagulant
In 3/4 cup water, add 2 tbsp lemon juice (or vinegar)
Keep this aside, we will use it later
Soy Milk
Drain this water and blend them with total 6 cups water. If you do not have high speed blender, then start with 2 cups water and add more water gradually.
You may need to do this in 2 batches if the blender jar is not big enough.
Pass this through a cheese cloth to extract milk. Check the video to see my set-up.
The left over pulp, called Okara need not to be discarded as it can be used in various other recipes (cakes, cutlets, flat breads etc.)
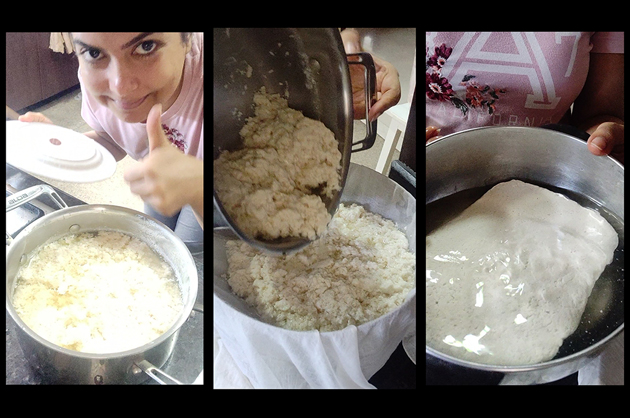
Making Tofu
Transfer the soy milk in a heavy bottom pan, else it may start to burn at the edges. You can also use a double boiler.
Bring the milk to a boil while stirring constantly to avoid sticking at the bottom.
You will notice some foam build up, remove it as and when you notice and keep stirring.
Once its boiled, turn of the stove and let it cool for 2 minutes while stirring.
Slowly add the coagulant, while stirring the milk in circles or the direction of the number 8
You can stop stirring as soon as you notice the milk has separated and curds are forming.
Stop adding the coagulant (and stirring) when water turns clear. If it is still milky, then you may need to add more coagulant.
Cover this with a lid and let it rest for 10 minutes.
Now use the tofu mould or the DIY mould. For DIY option, (shown in the video) place a large bowl (enough to catch all the water that will drain) and then put a colander on top. Also place the cheese cloth on the colander.
pour all the content in this and tightly pack the tofu with the help of the cheese cloth in any desired shape.
place some weight on this (500g to 800g) and let all the water drain out. The longer you keep this, the firmer tofu gets. Ideal time is about 20 minutes as I do not like this too hard. If you want very firm, you can keep the weight on for up to 40 minutes.
once the water is drained, remove tofu from the cloth and place in a bowl of cold water until you want to consume this.
To store, you can keep in an airtight glass/ceramic container, dipped in water for about 3-4 days in the refrigerator. I prefer to use fresh on the same day.
Notes
Soybeans can be soaked anywhere between 6 to 8 hours at higher temperatures around (32°C) and 9 to 10 hours at lower temperatures (22°C).
I do prefer longer soaking time of up-to 12 hours and change the water after 6 hours (else it may start to smell). This allows to release more anti-nutrients in the beans.
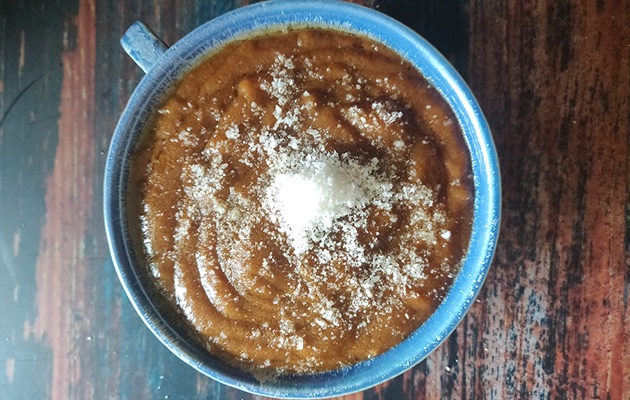
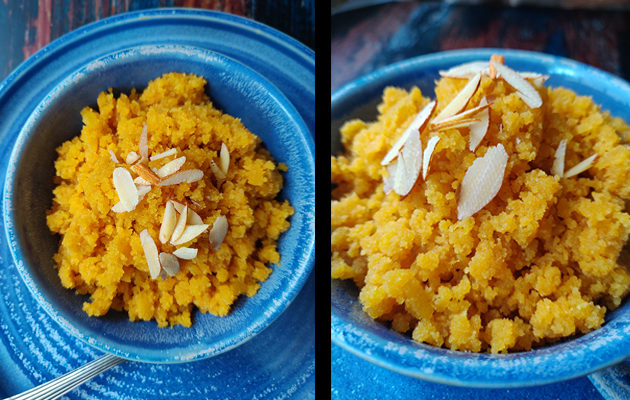
This is in continuation to my previous post on the two dishes I made using oil during paryushan. First was Dal Ka Halwa and this is Amaranth Halwa. The recipes are quite similar, but in this one we don’t cook the jaggery-water syrup for long …
I have been vegan since 2017 and on a mostly raw, whole foods, plant based diet since 2018. I consume raw, cold pressed oils occasionally in salads or as a topping in a few dishes. The only time I consume cooked oils is when I …
When i decided to do ekasana for all 8 days this Paryushan, I was worried how will I survive on just grains and pulses. Usually, my meals are about 80% fruits, veggies, nuts and seeds with a small amount of grain/pulses as a part of my 1 cooked meal of the day. But I was surprised with the amount of dishes I could come up with despite the limited options available. This recipe is inspired by a friend’s Poha Payasam recipe, I had to tweak it a little to make it Paryushan friendly. It came out so much better than what I could have imagined. If I had not come across Viji’s recipe, I would have never thought of making kheer with poha!
Here is the Paryushan friendly version of the Poha Payasam