Yummy New Posts

Home Remedies for Cold, Cough and Mucus. Dr. Biswaroop’s Method

Home Remedies for Cold, Cough and Mucus. Dr. Biswaroop’s Method

This Diwali, I accidentally left a window open for few hours and as a result, ended up with a lot of smoke in my room. I woke up with a sore throat which turned into a severe cold, cough and lots of mucus! I healed 

Healthy Vegan Dessert Recipe | Rich in Calcium, Protein, Omega 3

Healthy Vegan Dessert Recipe | Rich in Calcium, Protein, Omega 3

A conversation between vegans and rest of the world (RTW) RTW: are you a vegan? Vegan: yes RTW: where do you get your protein from? And what about calcium? Do you get enough Omega 3 in your diet? Vegan: Please check this recipe

Zucchini and Kale-Slaw, Vegan Coleslaw Recipe

Zucchini and Kale-Slaw, Vegan Coleslaw Recipe

I’ve been wanting to experiment with a vegan version of coleslaw. It is a very handy side dish. You can have it as a sandwich, with jacket potato or just as a side dish to any meal. After a few experiments, I came up with this recipe.

Vegan Coleslaw Dressing

Prep Time 5 mins
Soak Time 1 hr
Total Time 1 hr 5 mins
Course Side Dish

Equipment

  • Blender

Ingredients
  

  • 1/3 cup cashews ½ cup soaked 1-2 hours
  • 1/2 cup zucchini roughly chopped
  • Lemon juice from 1 medium lemon
  • 2-3 cloves garlic
  • salt, to taste natural rock salt or sea salt. Avoid table salt as it will have preservatives
  • cayenne pepper/red chilli powder
  • water as required for blending

Instructions
 

  • Put all ingredients in the blender with a little water and blend until smooth. You need a thick creamy consistency, not watery so start with adding little water at a time.
  • The dressing is ready. Use with any salad of your choice.
Keyword vegan salad, vegan salad dressing

Once the dressing is ready, you just need to pour a generous amount on the salad and vegan coleslaw is ready!

Vegan Coleslaw

Prep Time 20 mins
Total Time 20 mins
Course Salad, Side Dish

Ingredients
  

  • 1 cup grated carrots
  • 1 cup thinly sliced kale leaves (stem removed) or baby spinach
  • 1 cup grated zucchini
  • 1 cup thin sliced onions

Instructions
 

  • add everything in a large bowl,
  • then add generous amount of dressing,
  • mix well and keep in refrigerator for marination.
  • Can be consumed immediately but best to have after 2-3 hours
Keyword vegan salad

You can also watch a video of this coleslaw recipe

Vegan Phirni Recipe

Vegan Phirni Recipe

Here is a must try recipe for vegan phirni. I am also sharing the recipe to make home made almond milk in this blog.  

Oil-free, Vegan, Shahi Tofu Recipe

Oil-free, Vegan, Shahi Tofu Recipe

Vegan version of all time favourite shahi paneer needs no introduction. I had been wanting to share this recipe for quite some time, finally got the chance to do it. And of course, its oil-free and delicious!             Here are 

How to Heat Palnt-Based Milk, Vegan Turmeric Milk Recipe

How to Heat Palnt-Based Milk, Vegan Turmeric Milk Recipe

How to heat plant based milk?

Are you facing problems while heating plant based milk, then this blog is for you.
That’s right, today I am going to share how to make plant based milk that will not split or curdle while heating.

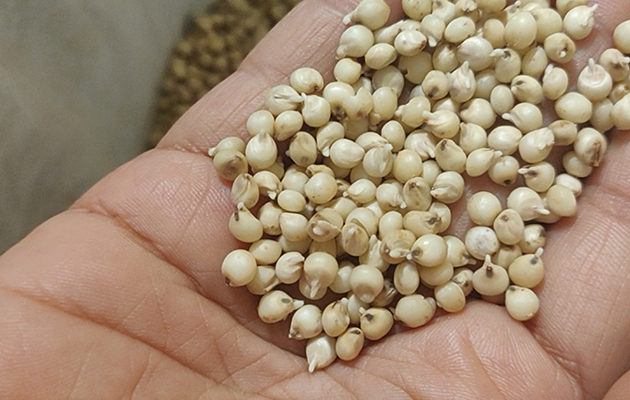
The magic ingredient is sorghum or jowar.

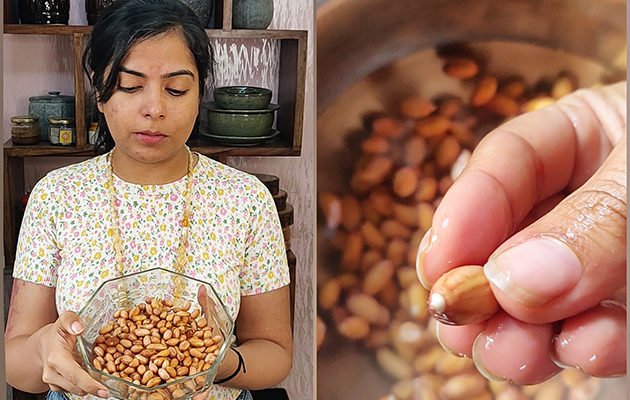
In my previous blog, I shared how to Sprout Sorghum. In today’s recipe I am using sprouted sorghum. But if you want, you can also use it without sprouting. Just roast the sorghum and use it directly.

Let us see what I did with the sprouted jowar to increase its shelf life.
Basically, you can sprout it in bulk, shade dry and roast it and then store it in airtight jar for weeks. And whenever you want to make milk, soak this roasted sorghum for 1 hour and make milk.

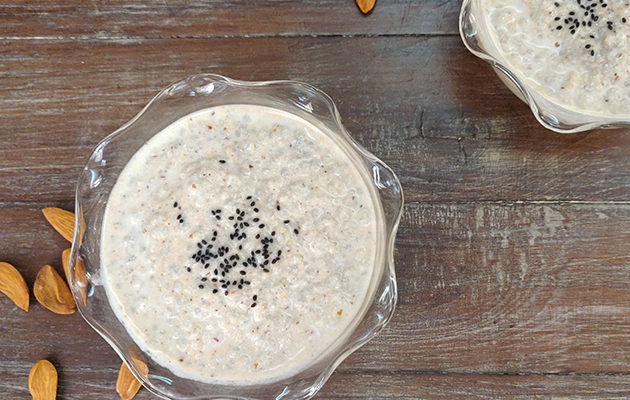
Sharing the detailed recipe below, along with a recipe of vegan turmeric milk Jump to Recipe that can be served hot or cold. Once you make the milk, you will end up with a lot of pulp. This pulp is precious and super healthy. Don’t throw it away. You can use it to make sweet or savory porridge. I am sharing the recipe of savory dish later in this blog. Jump to Recipe

Sprouted Sorghum (Jowar) Milk

Sorghum Milk

Prep Time 1 hr 10 mins

Equipment

  • Cheese cloth/muslin cloth/nut milk bag
  • Blender
  • A large bowl
  • Strainer/sieve

Ingredients
  

  • 1 cup Sprouted Sorghum can also use sorghum without sprouting
  • 3 cups water

Instructions
 

  • shade dry the sprouted sorghum for 2 days but laying it on a cloth in an airy place. If using unsprouted sorghum, then jump to next step.
  • once its completely dry, lightly roast it in a heavy bottom pan. Turn off the stove as soon as you hear the first cracking sound.
  • transfer to a plate and don't leave it in the pan to ensure sorghum stops cooking further. If its gets roasted too much, then the milk might get a burnt taste.
  • this roasted sorghum can be stored in airtight glass jars for 3-4 weeks (or 2 months in the fridge) and used to make milk when required.
  • soak this roasted sorghum in 1 cup water for 1 hour
  • drain this water and transfer the sorghum in a blender with 1/2 cup water
  • blend to form a coarse powder, and then add the remaining 1.5 cups of water
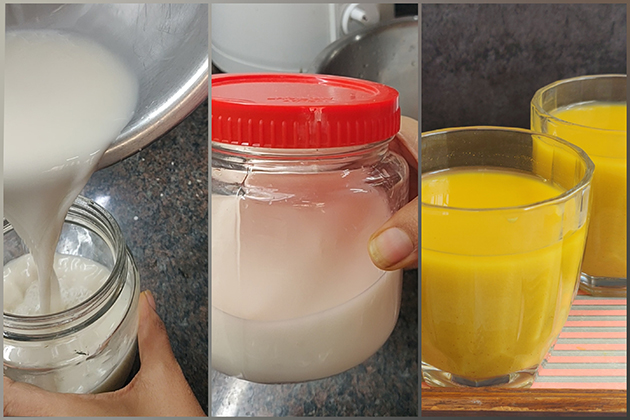
  • keep the bowl on the counter, place a sieve on top and then keep the cheese cloth on top of the sieve.
  • pass the blended sorghum through this. hold the cloth together and squeeze all the milk.
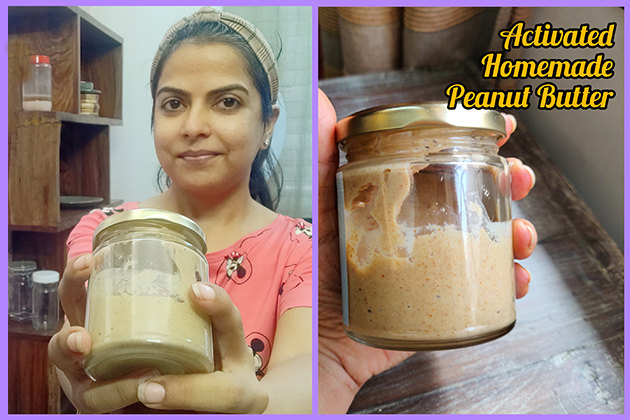
  • sorghum/jowar milk is ready.
  • you can store this in the fridge for 2-3 days.
Keyword plant-based milk, vegan milk

Vegan Turmeric Milk

vegan turmeric latte, vegan milk, vegan haldi milk, turmeric milk

vegan turmeric latte, vegan milk, vegan haldi milk, turmeric milk

Vegan Turmeric Milk

Prep Time 5 mins
Cook Time 5 mins

Equipment

  • mortar and pestle
  • Pan

Ingredients
  

  • 1.5 cups sorgham milk (jowar milk)
  • .75 cup water
  • 3 coin fresh, raw turmeric
  • 4-5 whole black pepper
  • 3 green cardamon
  • 1/8 tsp cinnamon powder
  • coconut sugar to taste or any other sweetener of your choice

Instructions
 

  • bring water to boil
  • crush the turmeric coins with mortar and pestle and add to boiling water
  • cook for about 30-40 sec
  • now crush the black pepper and cardamon and add to the pan.
  • next add the milk and heat till you see tiny bubbles at the edges. mix well and heat again for few more seconds. This milk will not split but if you keep boiling, it will become a little thicker.
  • now turn off the stove and add the cinnamon powder and coconut sugar.
  • you can serve this hot or cold!
Keyword plant-based milk, turmeric milk, vegan milk

Jowar (Sorghum) Dalia a.k.a Porridge

sorghum porridge, sprouted jowar dalia

Jowar (Sorghum) Dalia a.k.a Porridge

Prep Time 10 mins
Cook Time 40 mins
Total Time 50 mins
Servings 3 people

Ingredients
  

For Tempering

  • 1.5 tsp mustard seeds
  • 6-8 curry leaves
  • 1 tsp turmeric powder
  • 1.5 tsp coriander powder
  • 1 tsp red chilli powder

For Steamed/Saute Vegetables

  • 1/2 cup green capsicum diced, small
  • 1/2 cup tomatoes diced, small
  • 1/2 cup green peas
  • 1/2 cup french beans diced, small
  • 1/2 cup carrots diced, small

For Porridge

  • left over pulp from sorghum milk when using 1 cup sorghum to make milk
  • 6-8 cups water
  • salt to taste

Instructions
 

For Tempering

  • in a small pan, dry roast the mustard seeds and curry leaves
  • as they start to splutter, turn off the stove and add all 3 powdered spices. mix these well
  • let it cool for few minutes and then add 1/4 cup water to make a slurry and keep aside.

For Steamed/Saute Vegetables

  • lightly steam or saute all diced vegetables. make sure to add beans first and then carrots as these will take longer to cook.

For Porridge

  • With the help of a fork or your fingers, break apart the pulp so it has no lumps.
  • Take the pulp in another pan, add 4 cups water. Mix well to ensure no lumps are formed.
  • Keep cooking till it becomes soft. Add more water as needed.
  • Once tender, add the vegetables, salt and tempering in this and cook for 2-3 minutes and turn off the stove.
  • Porridge is ready.
How to Sprout Sorghum (Jowar) and Its Health Benefits?

How to Sprout Sorghum (Jowar) and Its Health Benefits?

In my previous post, I shared how to sprout peanuts and this post is about sprouting sorghum (jowar). The process is exactly the same as peanuts. If you have tried that, then you know what to do. What is Sorghum? Sorghum, also known as jowar/cholam/jonna 

How to Sprout Peanuts? Vegan Protein

How to Sprout Peanuts? Vegan Protein

Sprouts of lentils/pulses (specially moong & chickpeas) are quite commonly used in various recipes because of their numerous health benefits. When we sprout anything, the nutrient content increases by 30 to 40%. Or we can say, they become very easy to digest, and the nutrients 

Why I don’t consume store bought nut butters? Activated Peanut Butter Recipe

Why I don’t consume store bought nut butters? Activated Peanut Butter Recipe

1. All nuts/seeds/legumes have anti-nutrients that hamper digestion and to get rid of them, we must soak and if possible, sprout them. Commercially available nut butters are not made with soaked/sprouted/activated nuts and seeds. Very few brands may have this option but they cost a lot.

Jump to Recipe

2. They are loaded with other additives like salts, sugars, preservatives, oils etc. Just read the labels.

3. They are not made with love like the ones made at home 🙂

4. It is super easy to make at home. We just need to get better with time management. I have been making small batches to get the hang of it but the next batch is going to be a bigger one.

5. The way it is made, it has a decent shelf-life outside the refrigerator as well. I tried 3 months in Delhi’s hot summer and it was fine and then I finished it but I am pretty sure it would have lasted much longer.

Sprouted Peanut Butter

Prep Time 1 d 22 hrs
Cook Time 15 mins

Equipment

  • High speed blender
  • Colander
  • Cheese Cloth/Muslin Cloth
  • Oven / Stove + Pan for roasting

Ingredients
  

  • 1 cup peanuts
  • water as required for soaking and sprouting

Instructions
 

  • Take the peanuts, wash and soak them for 6 hours
  • Rinse well, wrap in a damp cloth and keep in a colander for 16 hours for sprouting. Do not need to sprout too much, as soon as you see a tiny sprout starts to grow, this is ready to use else they turn a bit bitter. Exact time will depend on the peanuts used and weather conditions. You can check every 2-3 hours.
  • Once they have sprouted, wash them thoroughly as they will have a slimy texture.
  • Shade dry them on a clean cloth for 24-48 hours, can keep under a fan for faster results
  • Once completely dry, roast them on a pan or in the oven until golden brown. I prefer doing this on low heat. Lower the heat, less nutrients are destroyed. Oven will give a more even result. If using an oven, you can set the temperature at 150 for about 15-20 minutes.
  • Allow these to cool down.
  • Now place the peanuts in a colander and give them a good rub to get rid of the skin (if you are using peanuts with skin). You only need to remove what comes off easily. I personally like the taste better if skin is removed and the color is lighter.
  • Transfer to a high speed blender and blend. At first, they will turn into a powder.
  • Keep blending, you may need to keep scraping the edges. It will start to turn creamier and eventually into butter.

Notes

Remove from the blender and transfer to a clean airtight glass jar. It's better to wash the jar with hot water and make sure it is completely dry, to ensure longer shelf life of the peanut butter.
I like to keep this outside the refrigerator as it stays soft. Outside the fridge, it will last a minimum of 2-3 months (longer in cold weather). In the refrigerator, will last at least 1 year.
Keyword butter, peanut butter, vegan butter