Thai Noodle Soup, Raw Vegan Soup Recipe | Gluten Free
Looking for vegan soup recipes? This raw vegan soup is inspired by the raw papaya salad and Thai red curry. Its delicious and super healthy. Try and tell me what you think.
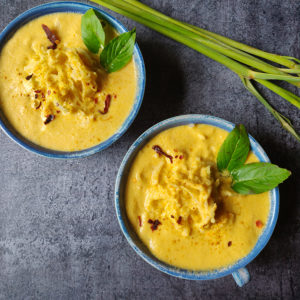
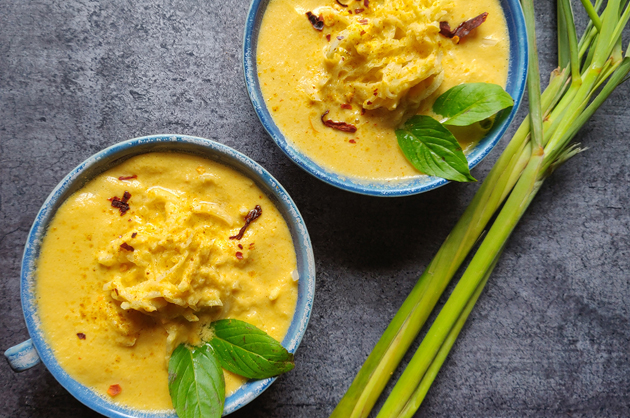
Raw Vegan Thai Noodle Soup
Equipment
- Blender
Ingredients
For Soup
- 3 medium red onions
- 1/2 cup carrot
- 1 soaked dry red chilli soaked for 1-2 hours
- Lemon juice to taste
- 1 lemon grass (bottom white part)
- ¼” ginger
- 25-30 fresh coriander stems just the 2-3” stems above roots, not the leaves
- 2 garlic cloves
- Salt to taste
- Curry powder to taste start with ½ tsp
- 1.5 cup coconut milk, recipe below
- 250 gm raw papaya noodles/grated/thin long slices
Garnish
- Basil leaves
- Chilli flakes
Instructions
- Add all ingredients except coconut milk and raw papaya noodles - in the blender with ½ cup coconut milk and blend to form a smooth paste
- Now add the remaining coconut milk and mix well.
- In a bowl, add the raw papaya noodles and pour the soup on top.
- Once ready, refrigerate for 2 hours for all flavours to seep in. This will also reduce the “raw taste” of certain vegetables.
- Warm: you can enjoy this soup warm in cold weather. For this, before adding the soup on top of the noodles, warm it up slightly.
I prefer to use fresh, home made coconut milk in this recipe.
Read my blog to learn all about coconut milk.
Below are the recipes to make it at home using a blender or a cold pressed juicer.
Coconut Milk Recipe using a Blender
Equipment
- Blender
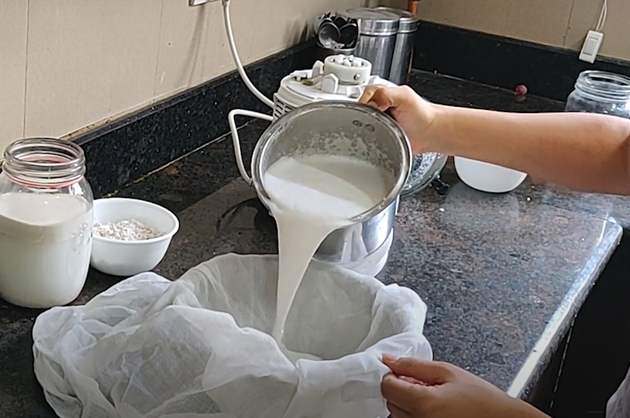
- Cheese cloth/muslin cloth/nut milk bag
Ingredients
- 1/2 Mature Coconut brown coconut, wet NOT the dry one. This will be approx. 1 cup coconut when loosely packed in pieces size of about 1 cm x 1 cm
- 2.5 cup Water you can use 3-4 cups water, based on how thick or thin you like it. Luke warm water will give better result.
Instructions
- Remove the outer husk/shell of the coconut. No need to peel the inner brown skin
- Roughly chop into cubes of approximately 1cm x 1cm. You can also grate it.
- Add these to the blender with 1 cup of water and blend to form a smooth paste.
- Add another 1/2 cup of water and blend again.
- Strain this through a nut milk bag/muslin cloth. This is your first batch of coconut milk.
- Now you will have the remaining coconut pulp in the nut milk bag.
- Put this pulp back in the blender and blend again with half cup water and repeat step 5. This will be batch 2
Notes
- Sometimes I use the pulp from batch 1 in other recipes, in this case, I do not make milk from batch 2 as it helps to have some milk left in the pulp.
- If you do not want to use the pulp elsewhere, it is a good idea to make milk 2nd time. However, this milk will be a lot thinner.
- I prefer to keep batch 1 for recipes that require thick milk and keep batch 2 for recipes that require thinner consistency.
- This will make approximately 1.5 cups of thick coconut milk in batch one and about 1 cup thin coconut milk in batch 2.
You can also watch a comparison video of the two methods to make coconut milk at home:
Coconut Milk Recipe using a Cold Press Juicer
Equipment
- Cold press juicer/slow juicer
Ingredients
- 1/2 mature Coconut brown coconut, wet NOT the dry one.
- 2 cup water
Instructions
- Remove the outer husk/shell of the coconut. No need to peel the inner brown skin
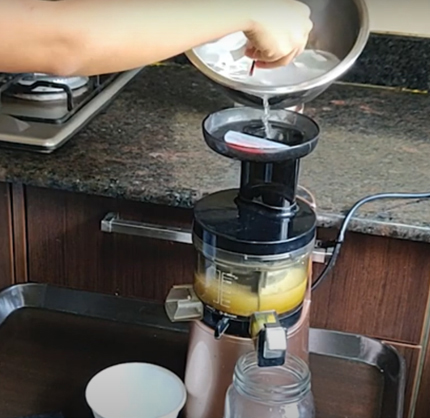
- Cut it into thin long slices so the pieces do not get stuck in the juicer (as shown in the video above).
- Add the coconut slices to a bowl with 2 cups water.
- Now start adding this to the juicer. Make sure to add the coconut slices and water simultaneously to the juicer (as shown in the video above).
- Coconut milk is ready, no need to sieve it.
Notes
When making milk in the blender, you can not add the pulp back in the juicer for second batch of the milk.
Feel free to use the pulp as a scrub or in other recipes.
