Chickpea Yogurt, Soy-free, Nut-free, Gluten-free, Vegan Yogurt
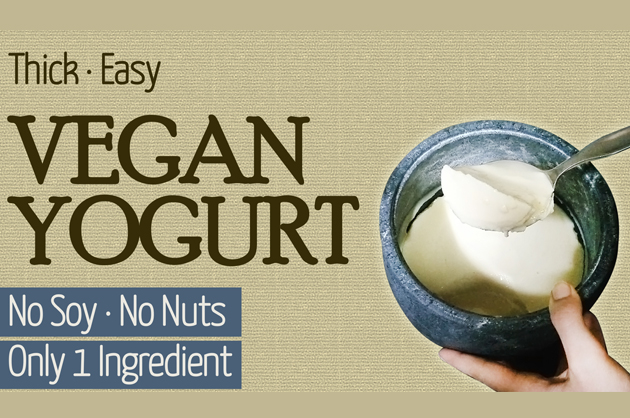
If you have decided to give veganism a try, we know it can be difficult to find alternatives to your favourite dairy products! But, don’t worry, we are here to help. Here is a very easy vegan yogurt recipe, that you can prepare with just one ingredient! This yogurt is high in protein that can be easily digested by the body. It is soy-free, nut-free and sets just like dairy yogurt! What are you waiting for? Scroll down to discover this ultimate recipe!
Print Recipe
What you need:
- 1 Cup Chickpeas (dry, not canned)
- Water (1 litre for soaking, 3-4 cups for making chickpea milk)
- Curd Starter. Option 1: 2 tbsp of soaking water from chickpea. Option 2: green chili crowns (head of green chilly).
This will make around 1L of vegan yogurt, if you want to make less, kindly adjust the quantity accordingly.
To watch a video of this recipe:
Procedure:
- Take 1 cup of chickpeas and soak it in one litre of water for about 12 hours. Alternatively, you can soak them in hot water for 8 hours.
Soaking time will vary on weather conditions. A good way to get this right is by looking for air bubbles in the soaking water. Once you see these, you are ready to go ahead to next step. - This water with the bubbles can be used as the curd starter. Take about 2 tablespoons of this water and store it to be used later. Strain the rest of the water into another container. This can be used to water your plants, but do not consume it yourself.
- Take 3-4 cups of fresh drinking water. Add the soaked chickpeas to the blender along with 1 cup of water and blend. Then, add a little more water to it and blend again to form a smooth paste. Add the remaining water to it and mix with a spoon. We avoid adding all 4 cups water at the same time to make sure we get a smooth paste first. If you have a high-speed blender then you can add all the water at once.
- Take a cotton cloth or a nut milk bag and place a container below it. Add half the quantity of the chickpeas paste to the cloth/bag and squeeze it to extract the milk. Repeat this with the other half of the chickpeas paste. The pulp that is left behind can be added to chapathi flour, soups, dals, or other recipes. You can also mix it with boiled potato/sweet potato and other vegetables and herbs to make cutlets.
- Stir the milk, then, move it to a pan and place it on the stove. Stir it again to make sure it doesn’t settle at the bottom, before switching on the stove. If you don’t do this step, it will stick to the bottom and turn into a solid gel. Keep stirring the milk until it begins to boil and the consistency is thick like custard.
- You may notice foam building up during this process. You can remove it as and when required, but its not necessary as we will be fermenting this.
- Once the milk has boiled and you have the right consistency, switch off the stove and let it cool down. You can keep stirring to make sure it cools down evenly. Else it will cool from the top and still be hot underneath.
- Wait till the milk comes to a lukewarm temperature. You can check the temperature by adding a few drops of it on your finger. It shouldn’t burn your finger, but should feel comfortably warm.
- Transfer the milk to a non-metallic container. Glassware, stoneware and earthenware are good options. Avoid fermenting anything in metal or plastic as they leach into your food or the bacteria reacts with them.
- At this point, Add 2 tablespoons of the soaking water that you saved at the start of this recipe. This will act as a starter. If you start preparing this recipe on a regular basis, you can use 1 teaspoon of whey (water from the previous day’s yogurt) as the starter. This will make the fermentation process faster.
- Stir the starter thoroughly. You can also use your clean finger to stir to give additional bacteria from your skin. Cover the container with a loose lid and let it sit.
- The process can take anywhere between 6 to 12 hours depending on the weather. If the weather is very cold, you can cover the container with a blanket to keep it warm.
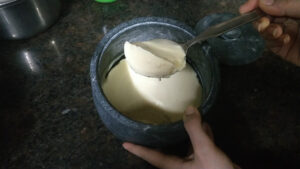
- Your dairy, soy and nut-free yogurt is ready!
When it is ready it will look just like dairy yogurt/curd and will have a thick consistency.
TASTE ALERT!!!!
It has a beany taste, and I do not like it as it is. It works really well in savoury dishes like raita, kadhi and chaas! You can also use this for baking.
To use this vegan yogurt for sweet dishes, you can try these tips below that were suggested by my YouTube subscribers.
TIP 01: “While soaking the chickpeas, add a few dates in this water. Once soaking is done, remove the dates and few spoons of this soaking water to make date paste. Now use 2 tbsp of this date paste as a starter. Also add some lemon zest when you add the starter.”
TIP 02: Add some vanilla powder when you add the starter, this helps mask the beany taste a bit, and before consuming must add some lemon juice with your choice of sweetener to further reduce the beany taste. It will taste great.” by Emine Demir.
Enjoy your dairy-free, protein rich vegan yogurt/curd!
Chickpea Yogurt
Equipment
- Blender
- Cheese cloth/nut milk bag/muslin cloth
- Heavy bottom pan
- Curd pot/Non metallic pot like glass, clay, stone, ceramic
Ingredients
- 1 cup dry chickpeas need to use dry chickpeas, not canned. Should be raw, not cooked.
- 4 cup water for soaking
- 3-4 cup water for making milk
- Curd Starter. Option 1: 2 tbsp of soaking water from chickpea. Option 2: green chili crowns (head of green chilly)
Instructions
- Soak the chickpeas in 4 cups water for 8-12 hours. This depends on your weather. If its hot and humid, 8 hours will be enough.
- CURD STARTER: After 8 hours, water should have bubbles. Save 2 tbsp of this water to be used as the curd starter. In case you forget to save this water, 5-6 green chilli heads can also be used.
- Strain the remaining water, you can use this to water your plants.
- Now blend the chickpeas in the blender with 1 cup of fresh water to form a smooth paste. Don't blend it too much, else it will be difficult to extract the milk. It should be a little coarse.
- Now add the remaining 3 cups water (or 2 to reduce cooking time) and blend just for few more seconds.
- Take a cotton cloth or a nut milk bag and place a container below it.Add half the quantity of the chickpeas paste to the cloth/bag and squeeze it to extract the milk.
- Repeat this with the other half of the chickpeas paste.
- Stir the milk, then, move it to a pan and place it on the stove. Stir it again to make sure it doesn’t settle at the bottom, before switching on the stove.
- Turn the stove on and heat the milk on medium heat. Keep stirring the milk until it begins to boil and the consistency is thick like custard.
- You may notice foam building up during this process. You can remove it as and when required.
- Once you have the right consistency, switch off the stove and let it cool down.
- Keep stirring to make sure it cools down evenly. Else it will cool from the top and still be hot underneath.
- Transfer the milk to a non-metallic container.
- Add 2 tablespoons of the soaking water that you saved at the start of this recipe. This will act as a starter.
- Stir the starter thoroughly. You can also use your clean finger to stir to give additional bacteria from your skin. Cover the container with a loose lid and let it sit.
- The process can take anywhere between 6 to 12 hours depending on the weather. If the weather is very cold, you can cover the container with a blanket to keep it warm.
- Check back in 6-8 hours. It is done once it has a sour taste.
Video
Notes
- While making the milk, you can use minimum 3 cups water (instead of 4) to reduce the cooking time but this will leave a stronger bean-y after taste in the yogurt.
- The pulp that is left behind can be added to chapathi flour, soups, dals, or other recipes. You can also mix it with boiled potato/sweet potato and other vegetables and herbs to make cutlets.
- The yogurt has a strong chickpea taste, works very well in baking and savory recipes like kadhi, other indian curry or raita
Product recommendations by Priyanka in US
Product recommendations by Priyanka in INDIA
Our Brand of Reusable Menstrual Products
Use code HNY15 for 15% discount on SochGreen website.
Disclaimer: This blog contains affiliate links, which means that if you click on one of the product links, we will receive a small commission. This helps support the blog and allows us to continue to put up information like this. Thank you for the support!
Note: This is Priyanka Jain’s Recipe, Video transcribed by Rohini Ravee Ramanathan.

Many many thanks for this recipe. I have made it consumed it in deep gratitude with various toppings including flaxseed meal and even basil seeds. I am preparing my second batch and know I will start the third waaay before the second batch is finished.
I did two additional things: I strained the blended chickpeas two times and I added one tablespoon of MCT oil as an additional topping. Both of these things made the yogurt incredibly smooth. I also added a pinch of fine sea salt. And I used your suggestion of using an essential oil flavoring.
Now I also want to do some things with the abundant amount of pulp. Do you think it could become Burmese tofu? Thank you again
thank you for sharing your experience.. pulp wont become burmese tofu, but you can make cutlets with it. to make cutlets, add boiled potato along with chopped veggies and herbs.. or you can also add some chickpea curd to make super soft cutlets.
Can organic honey, or strawberry and/or banana powder be added for taste? If so, at what step of recipe?
ideally fruits should not be mixed with anything and consumed on their own… but if u wish to add, you can add once its ready. any sweetners can be added at the once, its fermented.